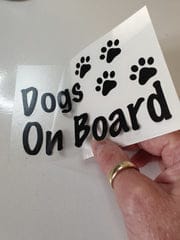
Our stickers are very simple to apply to most surfaces.
They will arrive on paper backing and covered with a transparent transfer tape. They will be posted in a board backed envelope.
- Wash the surface of the area where you will be applying the stickers to (outside of car window) or make sure its clean if its a wall. Be sure that the surface has not been in direct sun and is too hot you may want to move to the shade or the garage. Air bubbles are usually caused by the surface being too hot or not enough pressure on squeegee. Cold weather application temp. at least (55°)
- Place sticker face down on flat surface peel off the paper backing holding paper backing at a sharp angle. Stickers will be pre-spaced on a mounting tape.
- PLACEMENT AREA. It is not recommended for windows that rolls up/down or near wipers, front or back.
- DO NOT SCRAPE OVER STICKER WITH SNOW SCRAPER
- The bottom of the stickers will have a straight edge for easy alignment. Visually align sticker, press down top two corners to mounting surface, making sure there are no creases or wrinkles.
- Working from the center out, use a smoothing tool (a credit card or squeegee) will work just fine. Use firm overlapping strokes to apply. Be sure your sticker is applied flat with no creases as this may cause it not to adhere properly.
- Starting from the edge, very carefully peel off the transfer tape, keeping it at a sharp angle and holding it low to the surface. If a sticker does come up with the tape, simply smooth the tape back over it, press and smooth, and try again. If necessary, hold the edge of the sticker with a fingernail as you pull the tape away and smooth over the sticker once more. Give it a couple days before washing car.
